-
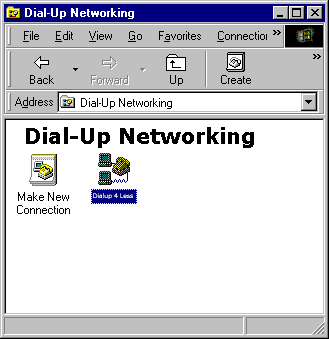
Create a New Dial-Up Networking Connection
-
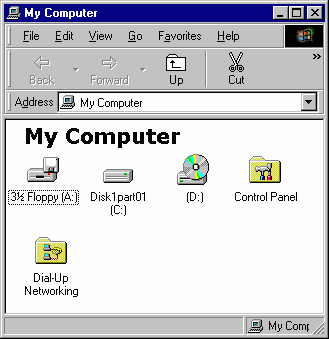
Double-click the My Computer icon.
-
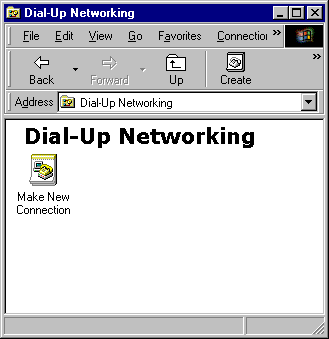
Double-click the Dial-Up Networking folder.
-
Double-click the Make New Connection icon.
-
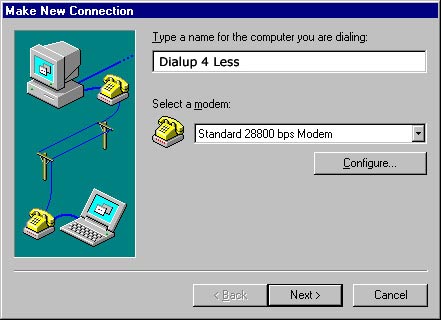
Under Type a name for the computer you are dialing, type Dialup4Less
-
Click the Next button.
-
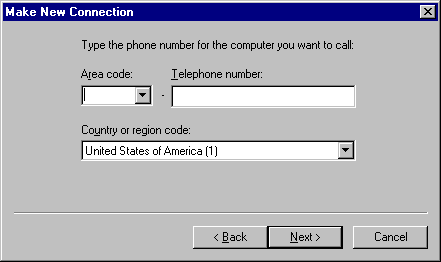
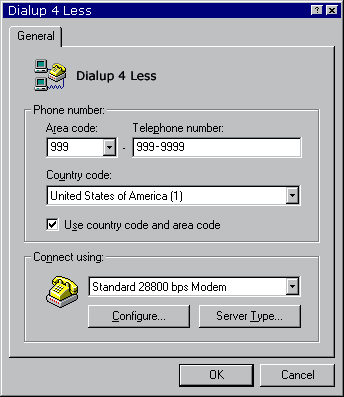
In the Area code and Telephone number boxes, type your Dialup4Less number.
-
Click the Next button.
-
Click the Finish button.
-
To create a shortcut to this connection on your desktop: right click on the Dialup4Less icon and click Create Shortcut. (An error message will pop up saying that windows can’t create a shortcut here, would you like to create one on the desktop instead, click yes.)
-
Next, in the Dial-Up Networking window, right click on the Dialup4Less icon and click Properties.
-
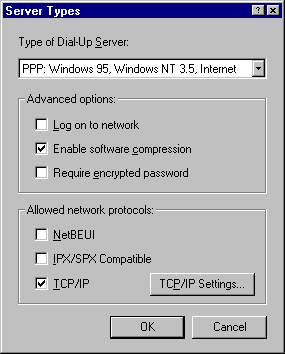
Click the Server Type button. (Or click the Server Type tab for Windows 98)

-
For Type of Dial-Up Server, select PPP: Windows 95, Windows NT 3.5, Internet.
-
Uncheck Log on to network.
-
Check Enable software compression.
-
Uncheck Require encrypted password.
-
Uncheck NetBEUI.
-
Uncheck IPX/SPX Compatible.
-
Check TCP/IP.
-
Click the TCP/IP Settings button.
-
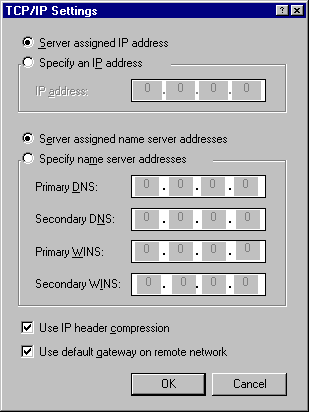
Select the Server assigned IP address button.
-
Select the Server assigned name server addresses button.
-
Check both Use IP header compression and Use default gateway on remote network.
-
Click the OK button.
-
Click the OK button.

-
Click the OK button.
-
To Connect, Double Click your newly created Dialup 4 Less Icon
-
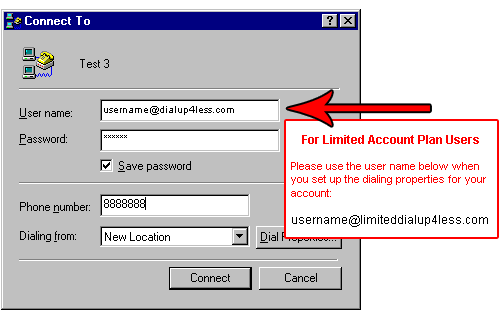
Enter in your username (make sure to put “@Dialup4Less.com” after your username ie: username@Dialup4Less.com)
-
If you are on the Limited Plan you must Enter in @“limitedDialup4Less.com” after your username ie:
username@limiteddialup4Less.com to be billed correctly!
-
Enter in your Password
-
Click on the Connect button and start surfing the net!
Back to Support Page
Please contact one of our Sales Representatives to discuss your particular requirements at 888-818-0444.